


Being an artist is not an accomplishment but a hunger to turn your inner-most emotion, thought or gut-feeling in an exquisite and enchanting form of artwork. This constant effort to match your consciousness with your art goes on and on inevitably.
However, learning a new form of art is still, the best experience that an artist has throughout his/her life (IMHO). For instance, you might be an incredible oil painter but what about watercolor paintings? Typically, painters of every genre feel a bit of stringency while learning the craftsmanship of watercolor pieces.
The working nature of watercolor paints is poles apart from the rest of the paints available today in the market, making it an extremely tough art to excel in. In this blog, I try to pick up some handy tips that artists like yourself should consider while trying a hand at watercolor paintings.
Before we proceed, we will take a quick glance at what is watercolor painting and how this art genre started.
The Rise of Watercolor Art!
If you would search on the web about the inception epoch of watercolors, you may end up into the pre-historic Paleolithic times. However, the interminable run of watercolor paints started during the so-called European Middle Ages and took the pace when the Renaissance started. Albeit being on the dot, watercolors were primarily used for making copies, cartoons, and sketches only.
Series of artists that include Van Dyck, Giovanni Benedetto, etc, were the firsts who introduced watercolor paintings and made sure that this particular form is in for the long haul.
Techniques that will help you get started
Creating a watercolor painting like every other art creation process demands dedication and undivided attention. This said, let’s jump to some of the tips that would help you crafting some mesmerizing and enthralling watercolor paintings:
Wet-on-wet
When beginning to work on watercolor artworks, always start with something simple. Because if you try to create watercolor wildlife paintings in your first attempt, it will as hard as walking on water.
So, a subtle landscape, blue sky, or squishy watercolor washes would provide an ecstatic breezy appearance that could be implemented in various manners. For this, a wet-on-wet technique fits in perfectly.
As the name suggests, this technique includes adding wet paint to a wet base/surface.
If you face trouble in starting, try a simpler method. Drench the brush into plain water and paint two rectangles. The rectangles will not be seen clearly but a bit of focus and tilted head will help you see them.
Now pick the wet paint from the palette, and paint one of the wet rectangles. Add gentle flicks of watercolor on the other rectangle. This task will help you discover the quantity of water and paint you will be requiring in the creation process.
Moving on, in a few minutes, you will see that the paint has begun to dry up. Notice the transiting texture and appearance of colors once they are dried up.
Those who wish to master the art of color paintings should always remember that your control on how paint reacts will be zero. The uncertain and varied characteristics of watercolors let these paints soak up in more than one way.
For most of the part, once dried-up, watercolors look less vivid. But the real value lies in the intriguing and disparate textures that emerge from the drying process. This technique is hence used a lot to incorporate texture to already made art pieces.
Wet-on-dry
For artists who have passed the elementary stage would now want to paint something more accurate and well-defined. This particular tactic requires the utilization of wet paint over a dry base.
Beginners, take the dry paper and start painting using the wet watercolor with a large brush. If you ever want to see what is watercolor painting really, the artwork made using this technique will show you.
The color you utilize to draw should be well drenched in, as the murkiness of your paint will be dependent on how well the water is blended in.
Artists looking to experiment with different textures should give dry paints a chance too. If you are expecting a sketch-like appearance of your painting, try using water but in extremely low amount.
Once again, the drying of paint makes different texture depending on the amount of water you have mixed with your color.
Intensification of the color
Watercolors are fragile. To make a watercolor painting that lasts longer, you would have to prepare a paint that is thicker and more stable.
This can be done with a series of simple steps.
First, take a small puddle of water and paint separately on your palette. Now pick a brush of medium size, dip it into plain water, and start drawing the strip on a paper. The strip won’t be visible easily. Now, add minute pigments of colors in the puddle of water on the palette. Be very careful and patient about the entire process as the addition of color in water should be minimum every time.
Now, use the brush to paint the transparent strip and add a bit of paint every time you pick the brush up making the entire composition more rich and vivacious. But above all, the paint will become concentrated.
Ensure that each time you lift your brush up to pick more color, you are rinsing and soaking it. With every stroke, the blend of watercolor amalgamation will become thicker, making the paint opaque.
Always remember to use a soft hand and patient approach as the transition from water to a highly concentrated paint is lengthy.
Repeating this task again & again would help the artists to come up with lusciously looking watercolor wildlife paintings and pieces that bolder and more vibrant.
Developing gradients
This is one of my personal favorites. Similar to the previous, this technique is all about fusing one color with another.
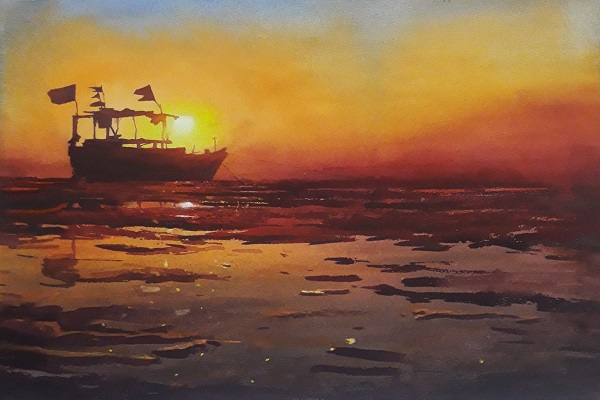
You must have seen the stunning skies and sunsets in watercolor paintings; gradients (mix of colors) make it possible.
Always remember that the blending of color is done logically. For instance, the colors that are far from each other on the color wheel would not end up mixing well together. So, make a harmonious amalgamation like green and yellow, red and orange, blue and green, etc.
To start this task, take both colors side by side. Ensure that both paints are neither too dry nor too wet. Include 50% water on both paints keeping a perfect balance. Use the first color only to paint the strip on a palette.
Now, pick your brush, clean it, and dip it into next color. Now dip the brush into the first color (creating a mix of two colors) and start painting again on the strip right from where you left the brushstroke. Do not use a hard hand or try to hurry the process.
Repeat this task multiple times to see the slow transition of color 1 changing in color 2. If the transformation is visible in a soft look, it means you have used the gradients perfectly.
Final Words
These are some vital tips about watercolor paintings that would assist my fellow artists to tighten their grip on this artistry too. If you have any comments, share them below. Thanks!
